Knowledge Base
How To Install a CMS Application in Plesk
A CMS (Content Management Systems) application is a graphical user interface for easier website content creation like WordPress, Joomla, or Drupal. Follow the steps below to install a CMS application in Plesk for Vodien Windows Hosting.
WARNING: Only follow the steps below if you don’t have an existing website yet. Otherwise, the installation will overwrite your current website contents.
- Log in to Plesk for Windows Hosting.
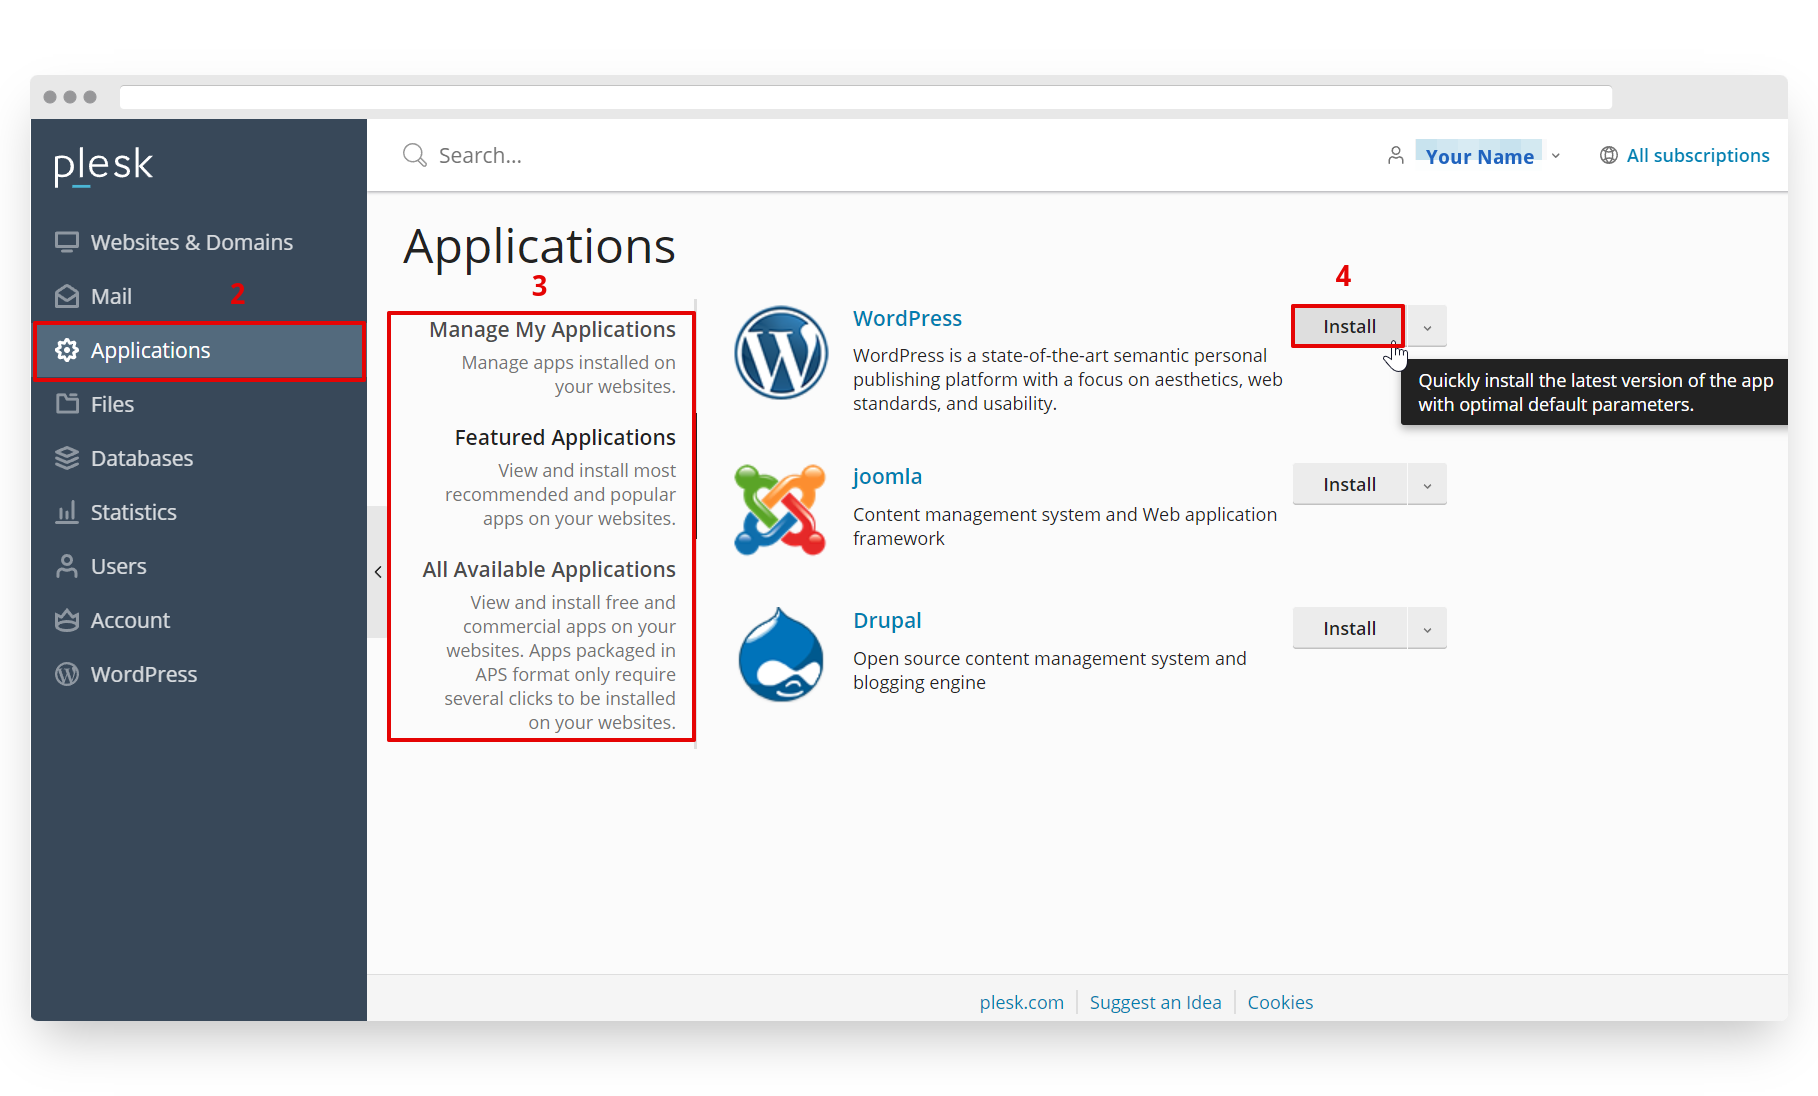
- Click Applications on the menu bar on the left side of the page.
- Click the filter on the left part of the Applications panel to filer the applications based on the following:
- Manage My Applications – This is where the currently installed CMS applications on your hosting account are listed.
- Featured Applications – Click this to see the most recommended and popular CMS applications that you can view and install for your website.
- All Available Applications – Click this if you can’t find the CMS application that you are looking for from the other two filters above.
- Click the corresponding Install button of the CMS application to install.
- Set up the website content’s location in the fields provided. This is also how your website link (URL) will look like once completed.
- Choose between http or https.
- http – Choose this if you want your website to default to HTTP. This can work for any website whether with SSL certificate or not. For websites with an SSL certificate, you can set this up to redirect to HTTPS later on inside the CMS’ website settings.
- https – Select this from the drop-down if you only want your website to be accessed via HTTPS.
- Choose a website root from the drop-down. Select among the main domain of your hosting, subdomain, or an addon domain.
- This field is optional. Enter a file path for your website e.g., help, blog, shop, etc. If you enter help in this field, this will publish your website with the URL of https://vd-support.com/help.
- Choose between http or https.
- Click Install.
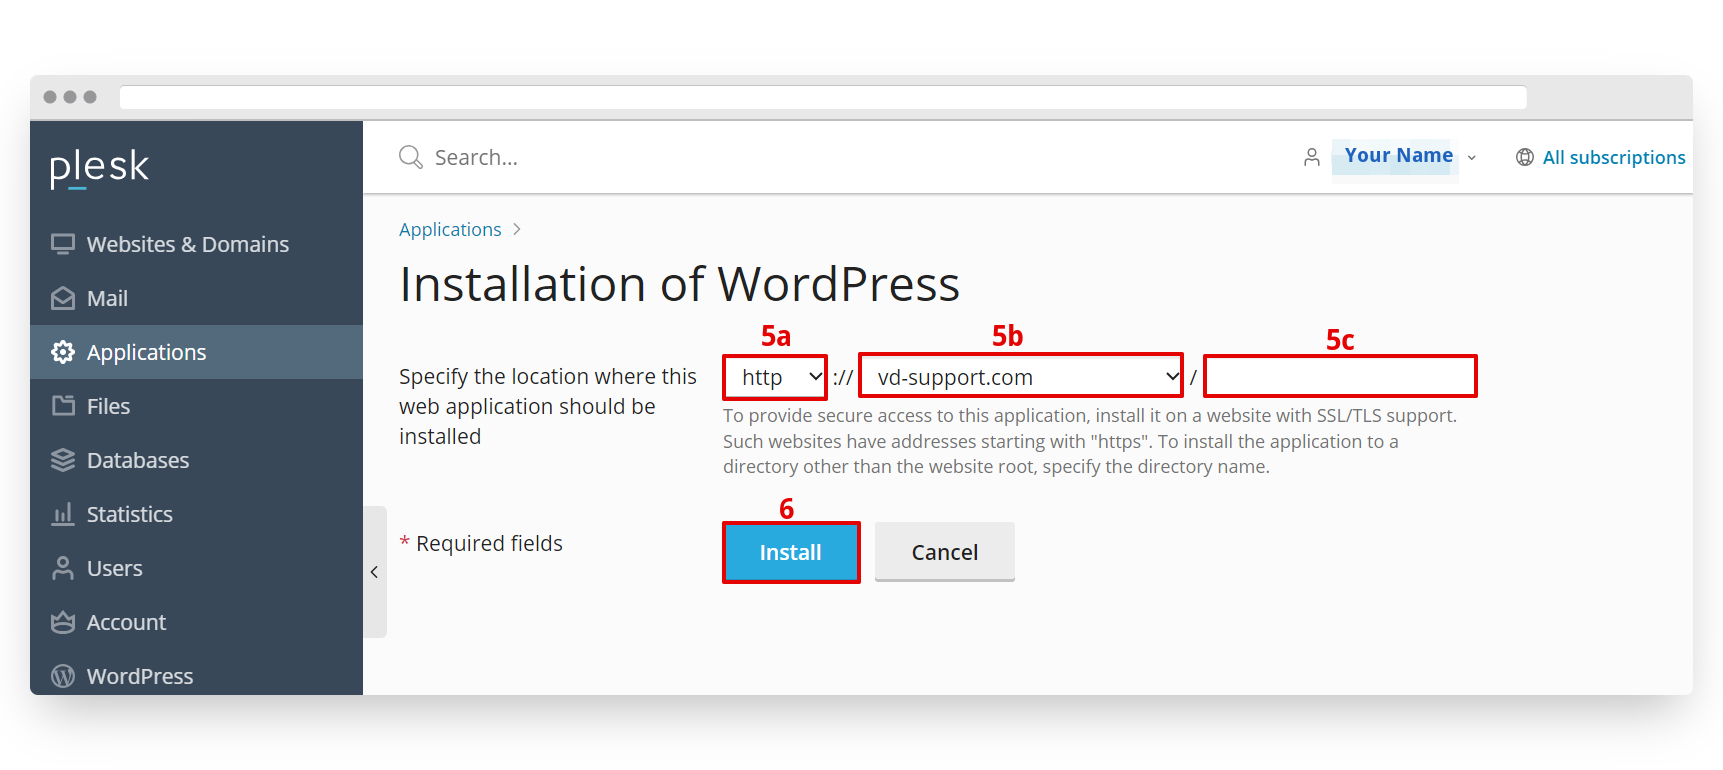
TIP: With the selections made above, this WordPress website will be accessible on the URL https://vd-support.com.
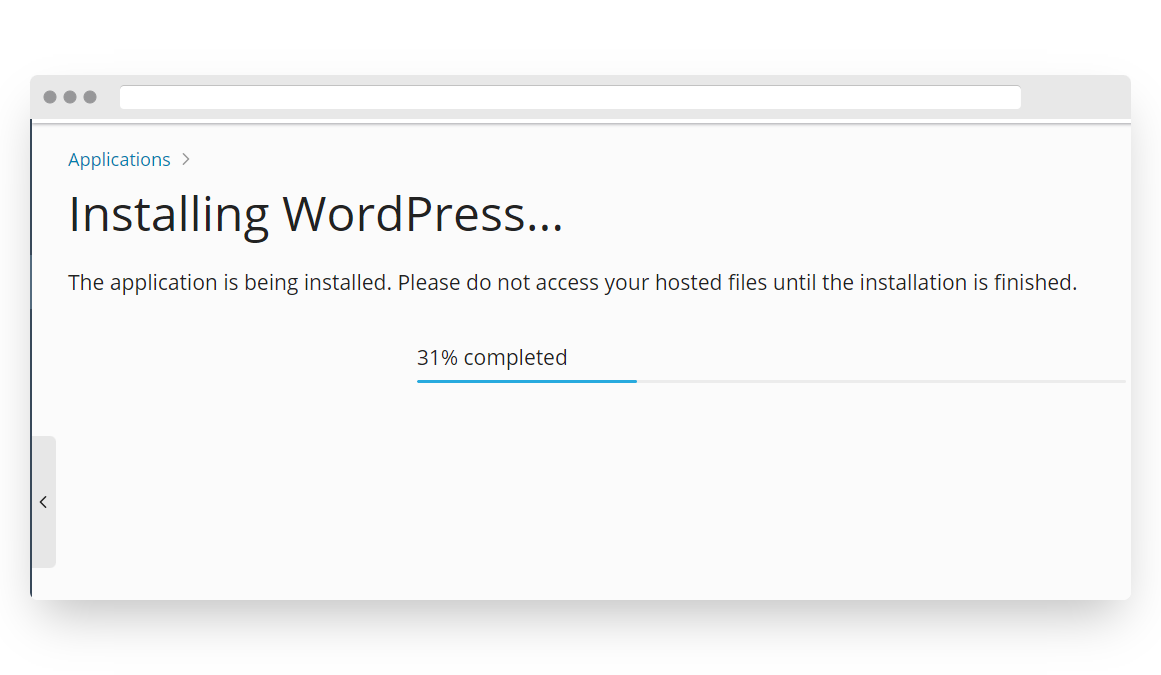
- Wait for the installation to finish.
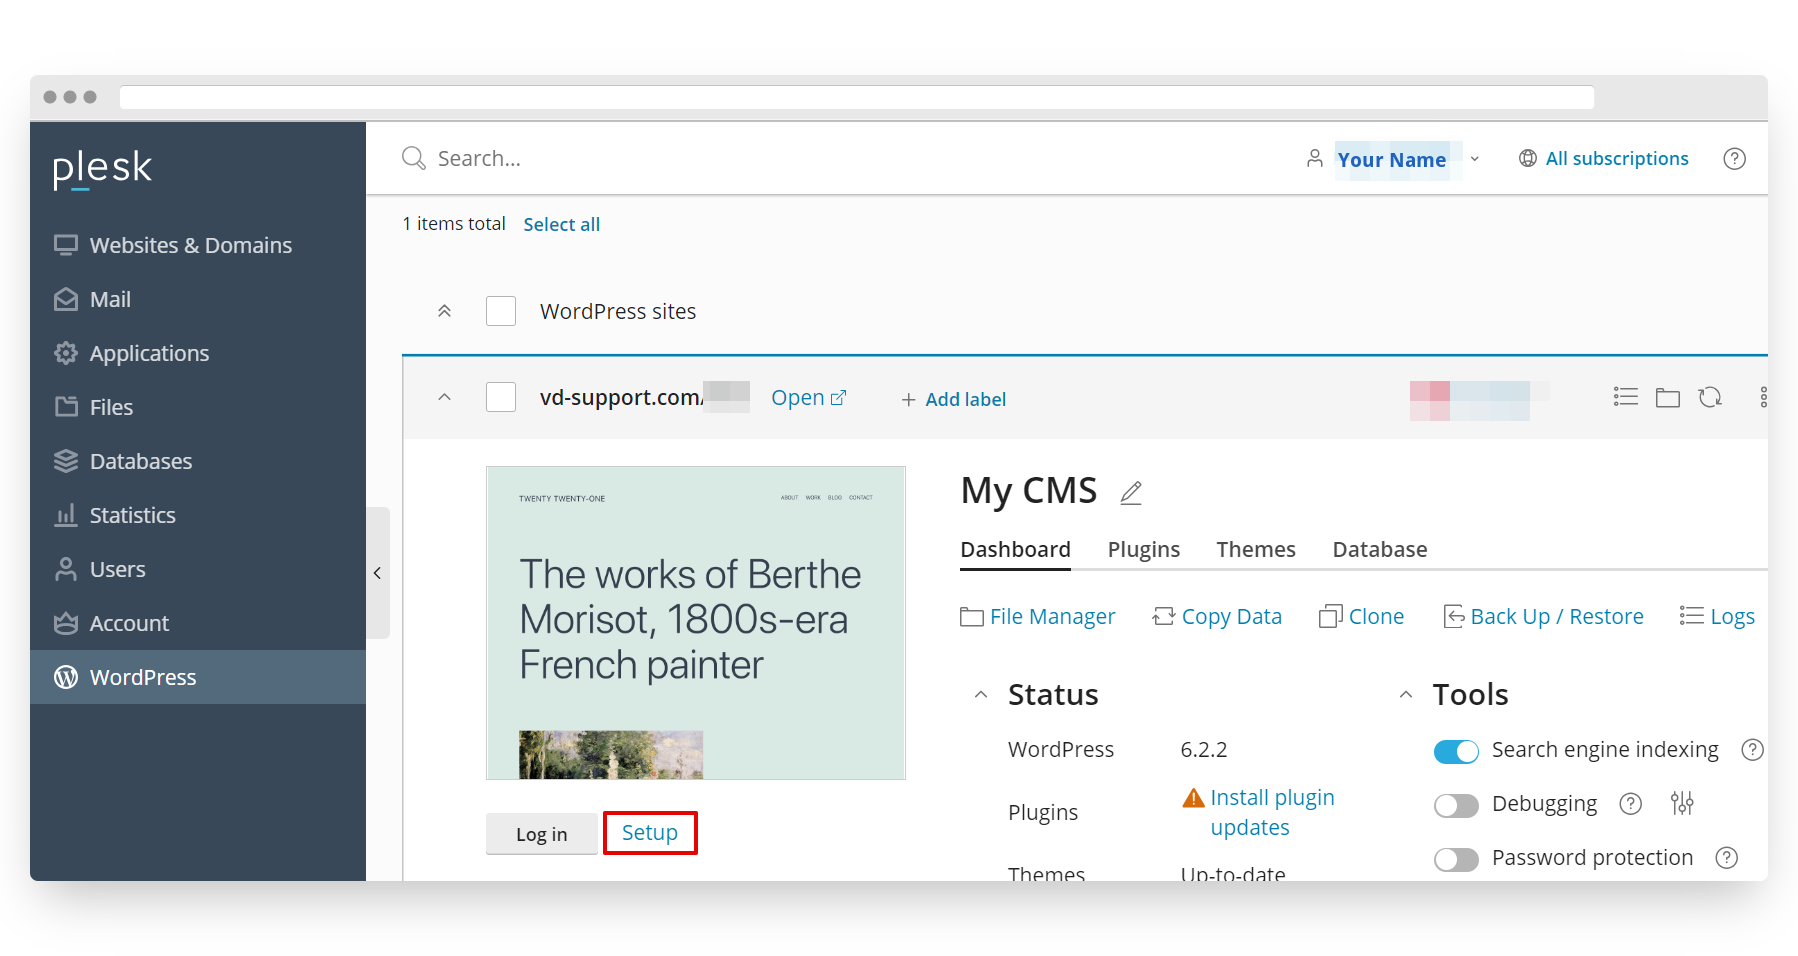
- Click Setup to see your CMS application admin username, password and the URL to login. The next page will also have the option to change the admin password and admin email.

Did you find this article helpful?