Knowledge Base
How To Set Up Titan Email on Gmail Web App
You can add your Titan email account to Gmail so you can conveniently access all your messages in one place. Follow the guide below to set it up easily.
IMPORTANT.
- Gmail suggests POP settings after it recognizes your email address. Please note that if you access your email through POP, it won't sync across multiple devices.
- To use Titan email on other email clients, you must first enable Titan for third-party apps.
Before you proceed, make sure you have:
- created your email account already
- tried accessing the email via webmail and confirmed that sending and receiving is working
- a stable internet connection
- your email address and password handy
Set Up Titan Email on Gmail
- Go to www.gmail.com. Ensure that you are logged in to your existing Gmail account.
- Click the gear ⚙︎ icon on the top-right, then click See all settings.
- Go to the Accounts and Import tab.
- Go to Check mail from other accounts, then click Add a mail account.
- In the pop-up window, enter the email address you want to set up, then click Next.
- Ensure that Import emails from my other account (POP3) is selected, and click Next.
- Fill in the POP3 mail settings (see the guide below).
POP Server Settings Username: Enter your complete email address
Password: Enter your email password
POP Server: pop.titan.email
Port: 995
Tick the following options:
☑ Leave a copy of retrieved message on the server box.
☑ Always use a secure connection (SSL) when retrieving mailbox.
☑ Label incoming messages box. - Click Add Account.
- Select Yes, I want to be able to send mail as, then click Next.
- Replace the Name if you want, ensure that Treat as an alias box is checked, and click Next Step.
- Enter the SMTP server settings (see the guide below).
SMTP Server Settings SMTP Server: smtp.titan.email
Port: 465
Username: Enter your complete email address
Password: Enter your email passwordTick the following option:
☑ Secured connection using SSL (recommended) - Click Add Account. Gmail will prompt you to verify the added email address, showing a verification screen like the one below:
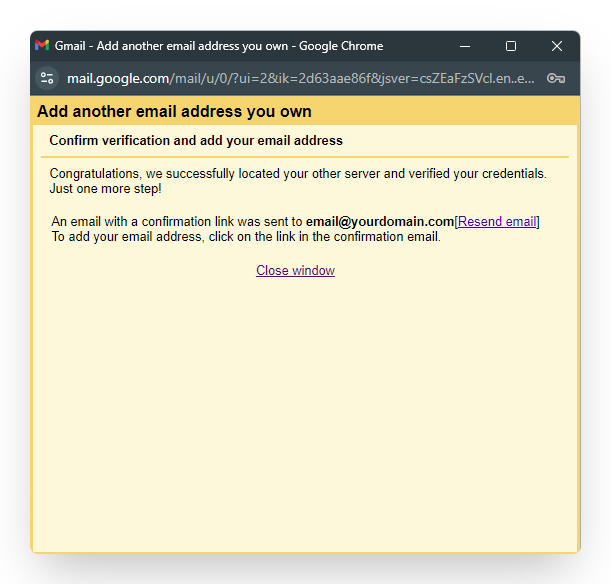
- Open your Gmail or webmail account and find the verification email sent to the newly added email address.
- Click the verification link and then click Confirm to complete the verification process.

You're all set! You can now check your emails in Gmail.
Edit Existing Email Client Settings
If your email isn’t working after adding it to Gmail, follow these steps to check and edit the server settings:
- In Gmail, click the gear ⚙︎ icon on the top-right, and then click See all settings.
- Go to the Accounts and Import tab.
- Scroll down to the Check mail from other accounts section and click edit info next to the Titan email account you want to update.
- Make the necessary changes. Refer to the tables above for the correct mail settings.
- Click Save Changes to apply your updates.
NOTE.
- Allow some time for your messages to completely load as you may not immediately see them after setting up your email account.
- Make sure to send a test email to confirm that everything is working correctly.
Did you find this article helpful?