cPanel for Linux Hosting
This article explains how to access the cPanel for your Linux hosting plan and where to find it within your hosting account. By following the steps in this guide, you'll be able to log in to cPanel and start managing your website, email accounts, and other hosting features with ease.
On this page
About cPanel
cPanel is a web-based hosting control panel used to manage Linux Hosting services. It provides tools for common website and hosting tasks through a graphical interface, allowing you to manage your hosting environment without using command-line commands.
With cPanel, you can perform tasks such as:
- Managing website files and folders
- Creating and managing email accounts
- Managing domains, subdomains, and redirects
- Creating databases and database users
- Installing applications such as WordPress
- Managing backups and security settings
- Viewing website statistics and resource usage
Our hosting plans with cPanel
The following are our hosting products with cPanel:
- Linux Hosting
- Business Hosting
- WordPress Hosting
- Website Builder (uses cPanel for emails only)
The available features and tools in cPanel may vary depending on your hosting plans.
Accessing your cPanel
You can access your cPanel depending on the hosting product you have with us.
For older (classic) hosting
Let’s make sure you’re on the right track. There are various ways to access your cPanel, depending on the cPanel-based product you've purchased.
First, review the hosting product table below and locate the product you have.
Next, click the instructions' link in the right column. This will direct you to the specific steps for accessing your cPanel.
| Hosting and website product | cPanel access instructions |
|---|---|
| Classic Linux Hosting ↗ | Access cPanel for Web Hosting |
| Classic Business Hosting ↗ | Access cPanel for Web Hosting |
| Website (Website Builder) ↗ | Access cPanel for Website Builder |
| Classic WordPress Hosting ↗ | Access cPanel for WordPress Hosting |
Access cPanel for (Classic) Web Hosting
- Log in to your Account Manager.
- From the top products menu, click Web Hosting.
- Choose the tab for the web hosting product you want to manage:
- Web Hosting
- Business Hosting
- Go to the domain name associated with the hosting plan you want to access, and click MANAGE.
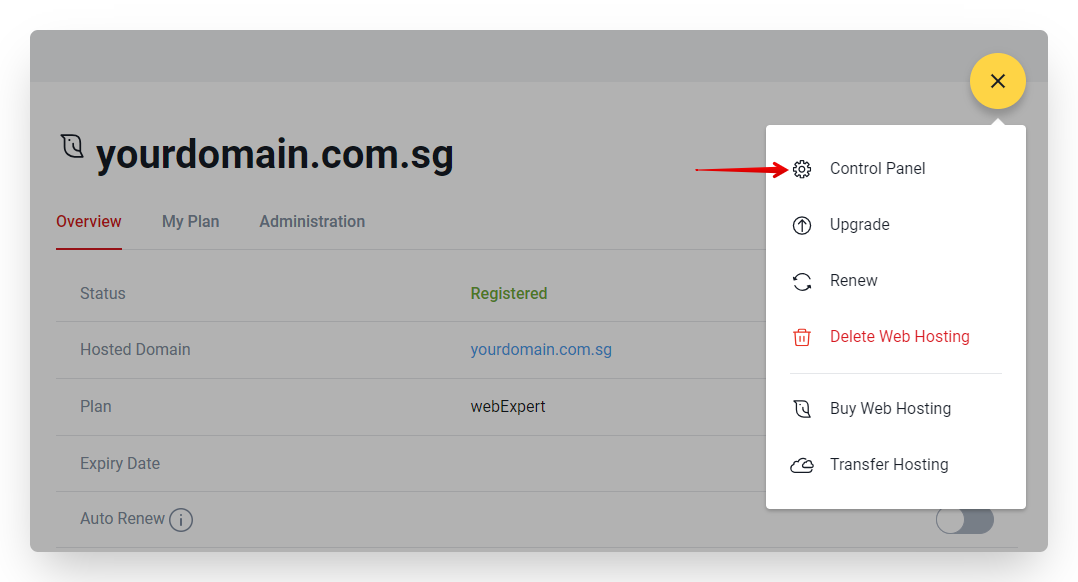
- Hover over the plus icon (+) at the top right, and select Control Panel.
Access cPanel for Website Builder
- Log in to your Account Manager.
- From the top products menu, click Website Builder.
- Locate your Website Builder product, and click MANAGE.
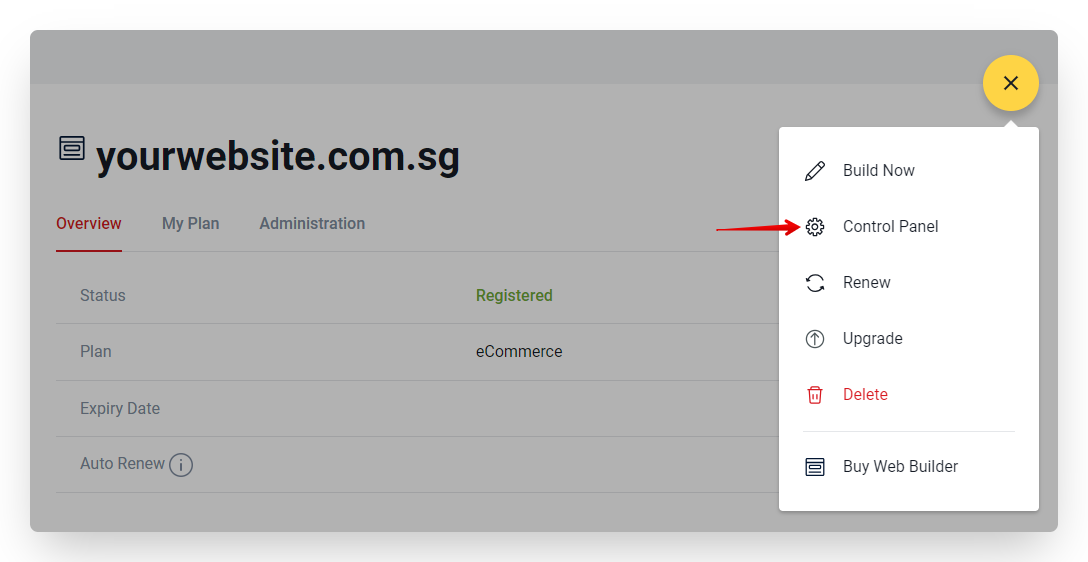
- Hover over the plus icon (+) at the top right, and select Control Panel.
Access cPanel for (Classic) WordPress Hosting
- Log in to your Account Manager.
- From the top products menu, click WordPress.
- Find the WordPress site you want to access, then click MANAGE.
NOTE. Each WordPress site you create will have a separate cPanel. So, make sure you select the correct site.
- Choose either Live Site or Staging tab—each has its own cPanel:
- Live Site. Your website in production, or your official live website.
- Staging. This is where you make changes before pushing it to the production or live site.
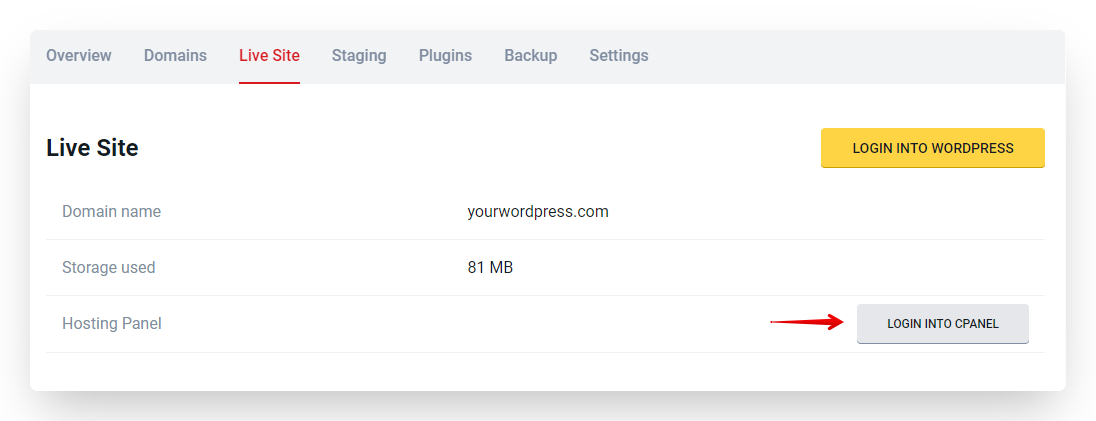
- Once the Live Site or Staging tab is open, click LOGIN INTO CPANEL.
You're all set!
You now know how to access the cPanel for your Linux hosting and navigate to your hosting management tools with ease. You're ready to manage your website, email accounts, and other hosting features whenever needed.