Knowledge Base
How To Install Magento Using SSH
Some web hosting server does not allow extracting of large files using File Manager. The extraction of these files can be done by connecting to SSH.
NOTE: This process is only applicable for Magento versions not later than 2.3 and with a Vodien Virtual Server or Dedicated Server Hosting.
Follow the instructions below on how to install Magento using SSH connection.
- Login or Create an account in Magento.
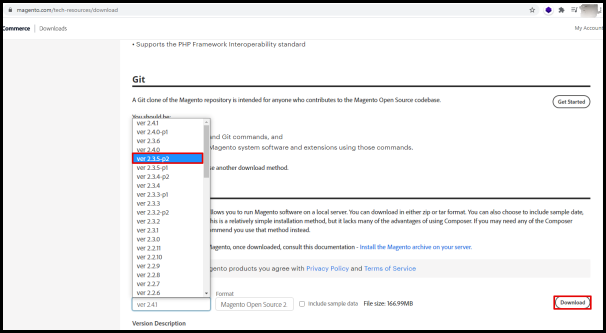
- On the same browser, access the download page of Magento.
- Scroll down to Archive (zip/tar) section and select any version not later than 2.3.5-p2.
- Click the Download button.
- While waiting for the download to finish, log in to cPanel.
- Upload the downloaded zip file to your File Manager or upload it via FTP.
- Connect to SSH from a Windows PC or Mac.
- Enter these commands and press the Enter key on your keyboard after each command.
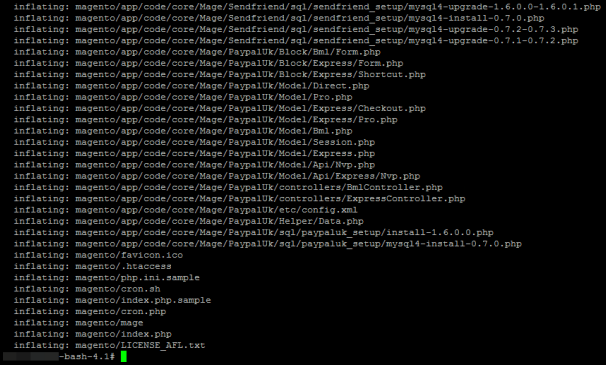
cd /home/cpanel_username/public_html/(subfolder if the directory is in subfolder)ls –alh - The configuration window will show the files and folders in the directory requested. Enter the command below with the exact file name to be extracted. Use the first command for a zip file and the 2nd command for a tar file.
unzip magento-file-name.zipuntar magento-file-name.tar
The files and folders extracted should show in the configuration window like in the screenshot below.
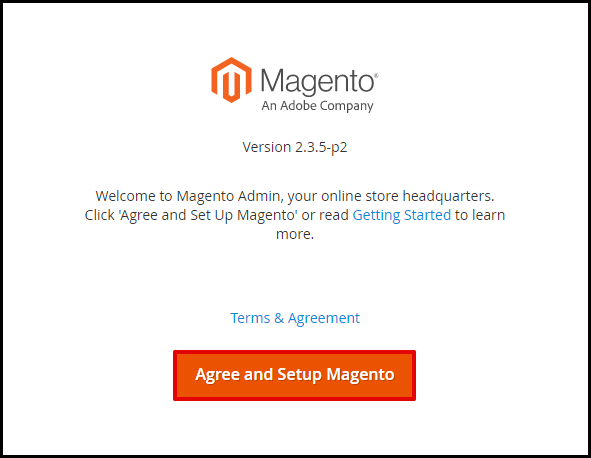
- Access your website’s domain or subdomain on the web browser without the HTTP.
- Click Agree and Setup Magento.
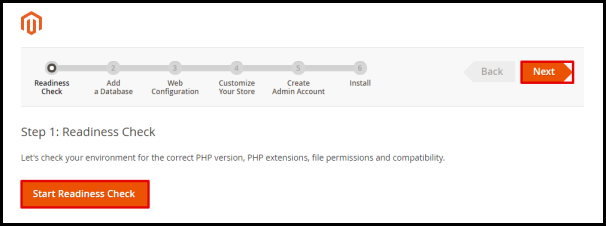
- Go through the setup from Steps 1-6. Click the Next button to proceed to the next step.
- Readiness Check – Click the Start Readiness Check button to initiate the checking of system requirements. Fix PHP requirements on your web hosting server if there are requirements not met.
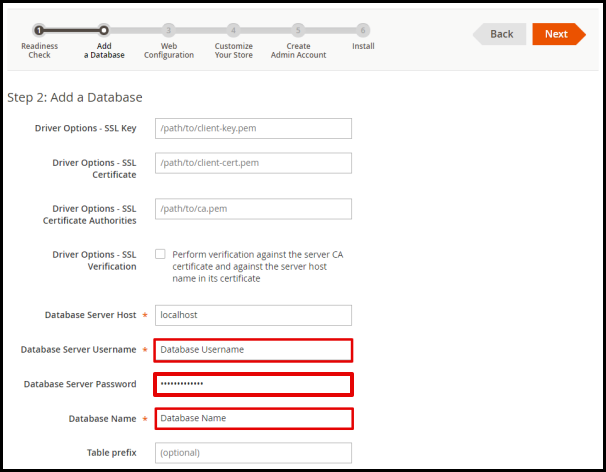
- Add a Database – The details on the highlighted boxes below can be obtained from your web hosting server during the creation of the database. Only the boxes with [*] asterisks are necessary to be filled in but Database Server Password is required for Vodien website hosting.
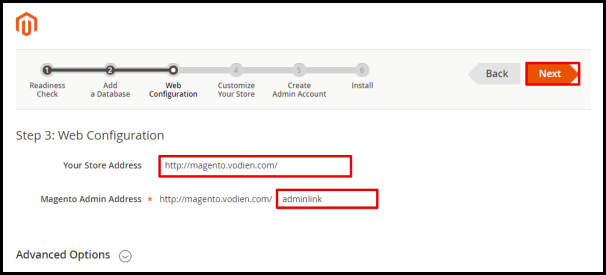
- Web Configuration – Enter your preferred website URL and admin page URL in the boxes provided.
- Customize Your Store – Choose the Time Zone, Currency, and Language for your website from the drop-down options.
- Create Admin Account – Enter the details for your Magento admin profile. Take note of these details as you will use them to log in to the backend of your website.
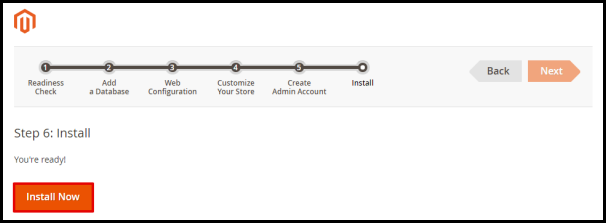
- Install – Click the Install Now button to start the installation.
- Readiness Check – Click the Start Readiness Check button to initiate the checking of system requirements. Fix PHP requirements on your web hosting server if there are requirements not met.
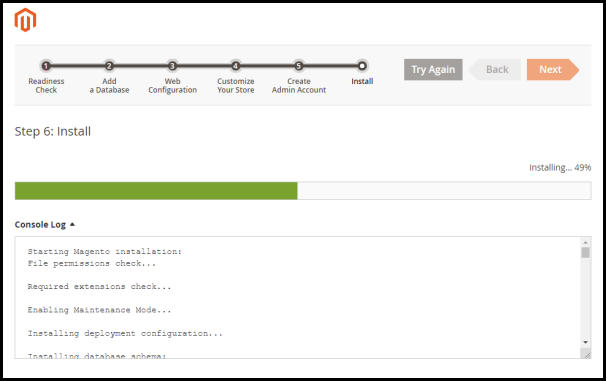
- Wait for the installation to be completed.
You have now successfully installed Magento and can now login to the admin page to start editing your website. Access the admin link set up from Step 11.3 to access the backend of the website.
Do not hesitate to contact our Singapore or Australia Support Team if you have further questions.
Did you find this article helpful?